Apple Tree Stamping Craft
As an Amazon Associate, I earn from qualifying purchases. This post may contain affiliate links. Read my disclosure policy.
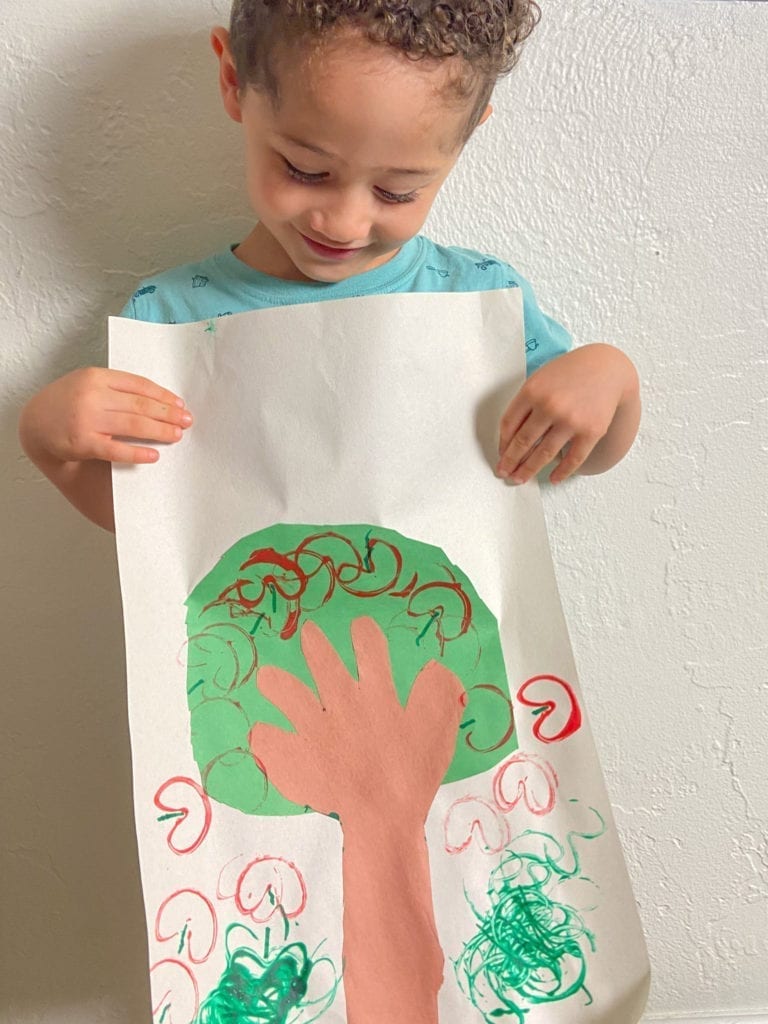
This Apple Tree Stamping Craft is perfect for preschoolers, with the help of an adult.
It’s fall, and apple season is underway. What a perfect time to do an apple craft! This Apple Tree Stamping Craft involves tracing, cutting, gluing and of course, stamping.
This Apple Tree Stamping Craft is great for:
- fine motor skills
- developing cutting skills
- creativity
- imagination
Fun facts about apples!
Take this opportunity to teach your preschooler about apples! While doing this craft, you can discuss things like:
- apples are fruit that grow on trees
- apple trees grow from the seeds found in the apples
- the trees need water and sunlight to grow
- apples are picked from July-November
- they can be red, green, yellow or pink
- it takes 3 apples to make one cup of apple juice
Tie this activity in with books!
It’s a good idea to supplement a craft or learning activity with books! It will give your child an opportunity to make connections between the two and to reflect on what they learned.
Check out these apple books below:


How do you make the Apple Tree Stamping Craft?
You will need:
- 1 piece of large white paper
- 1 piece of brown construction paper
- 1 piece of green construction paper
- 1 toilet paper roll
- paint (red and/or green)
- markers
- scissors
- glue stick
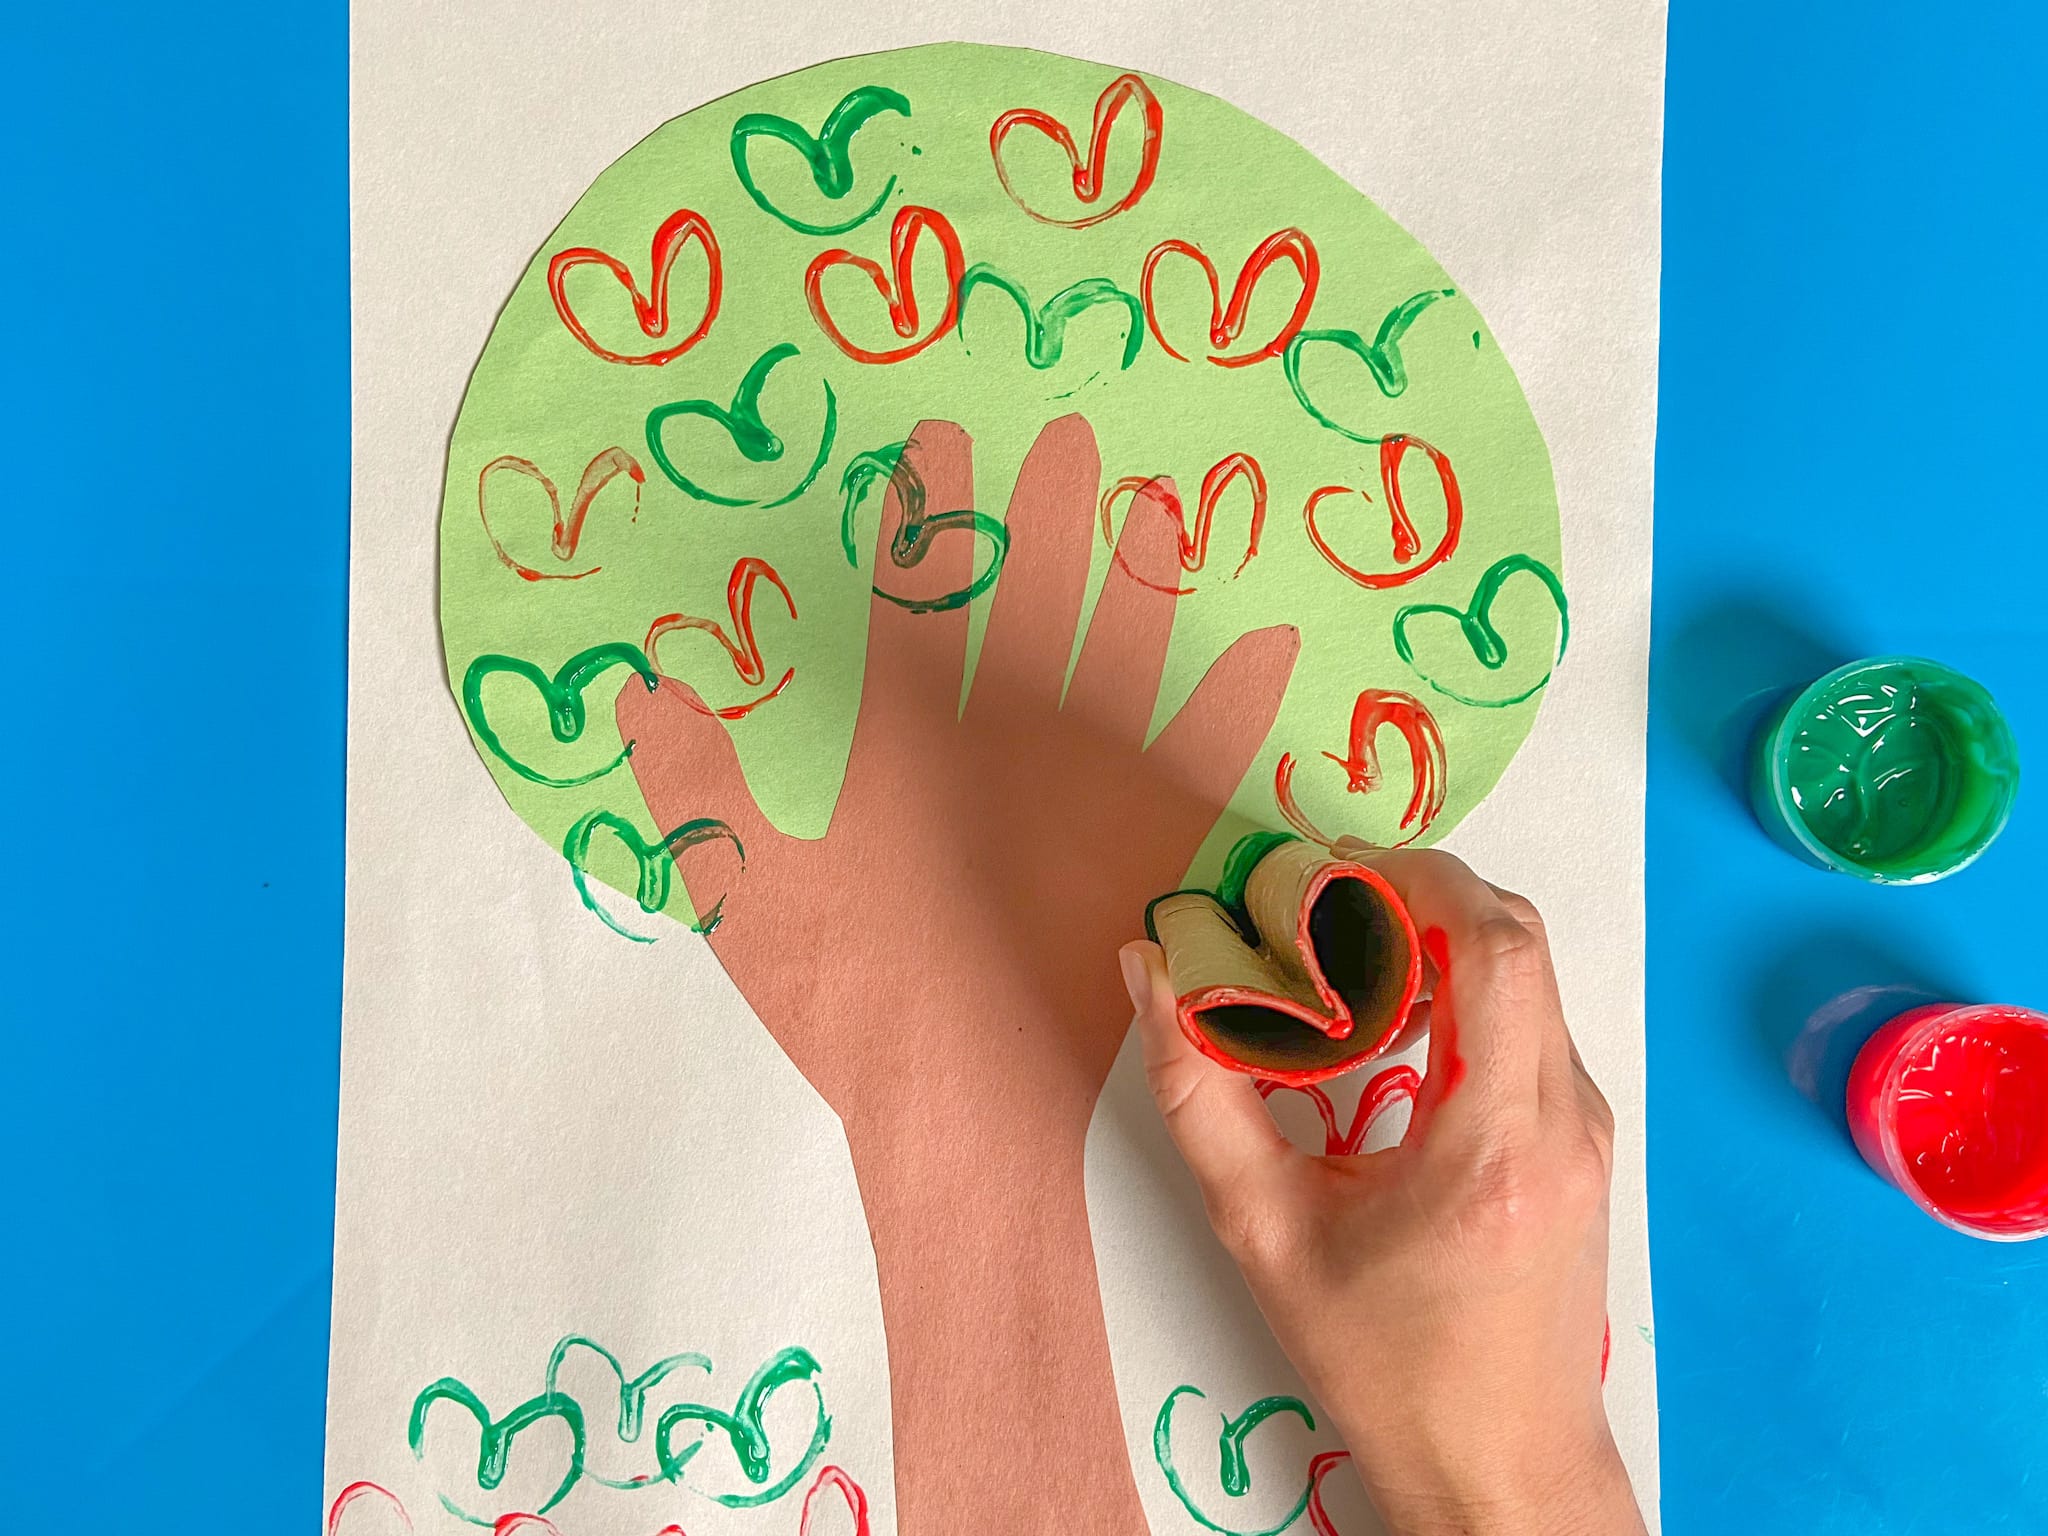
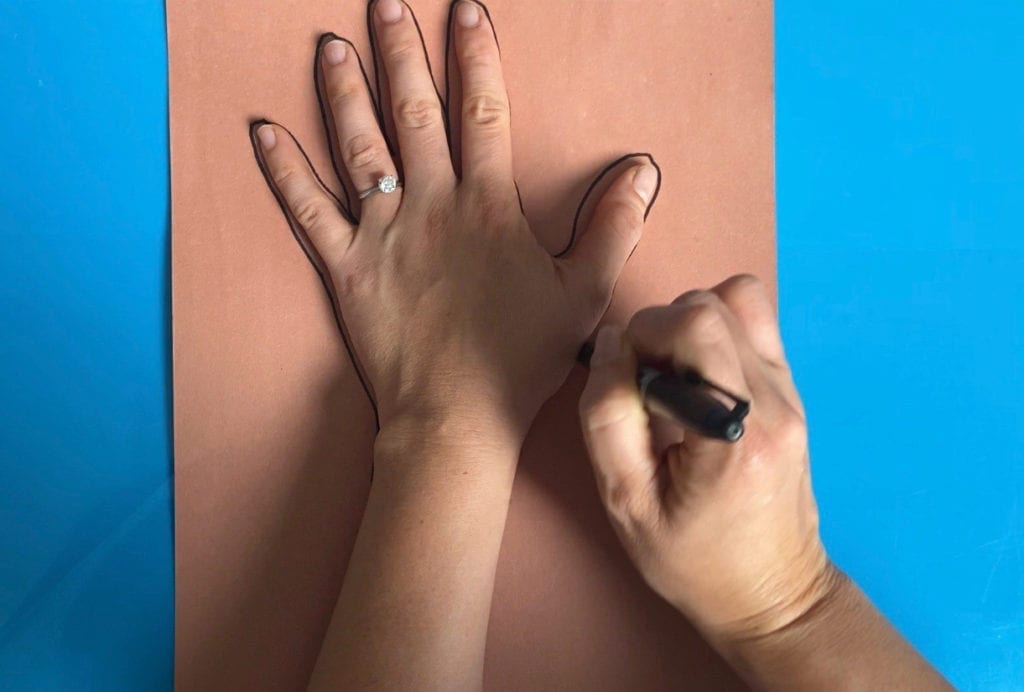
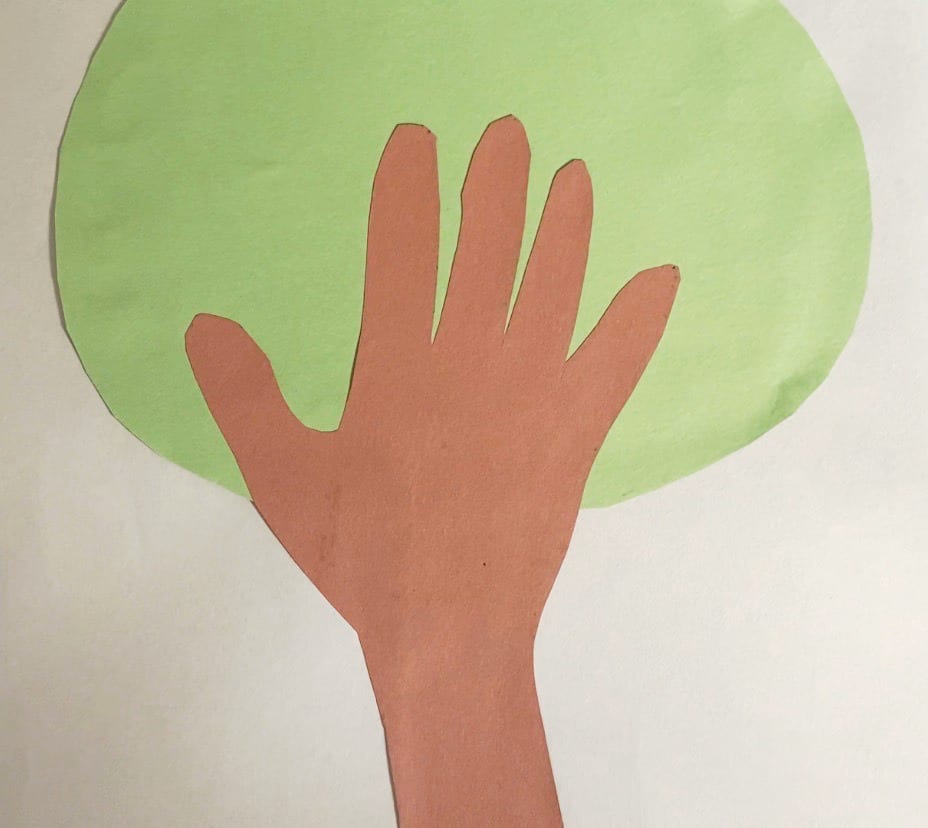
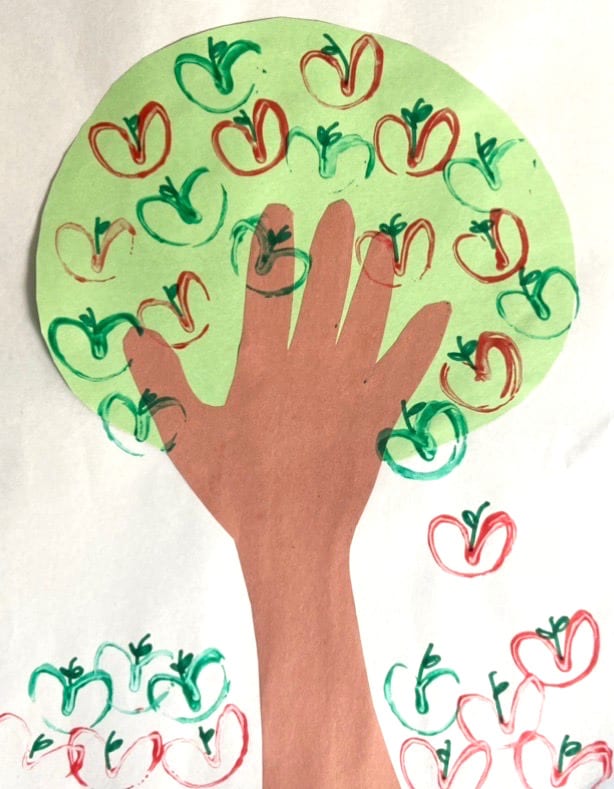
Step 1: Trace your child’s hand and arm with a marker on the brown paper. It’s best if his fingers are spread out, as they will become the branches. (If your child able to trace himself, let him do it! 🙂
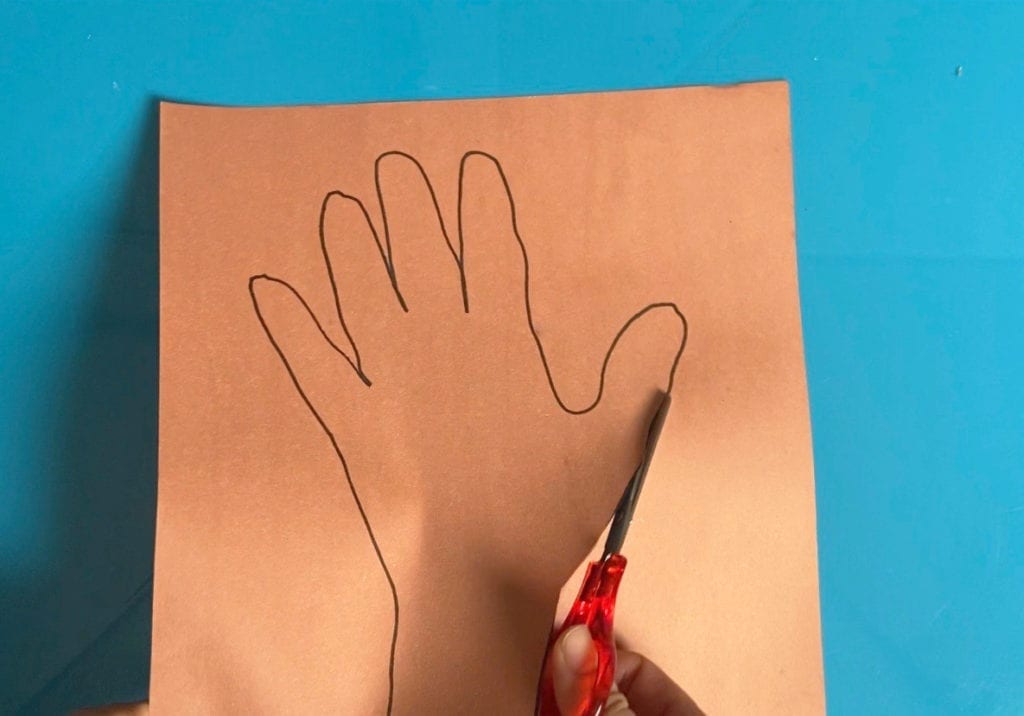
Step 2: Cut the hand out. Let your child practice cutting, if possible.
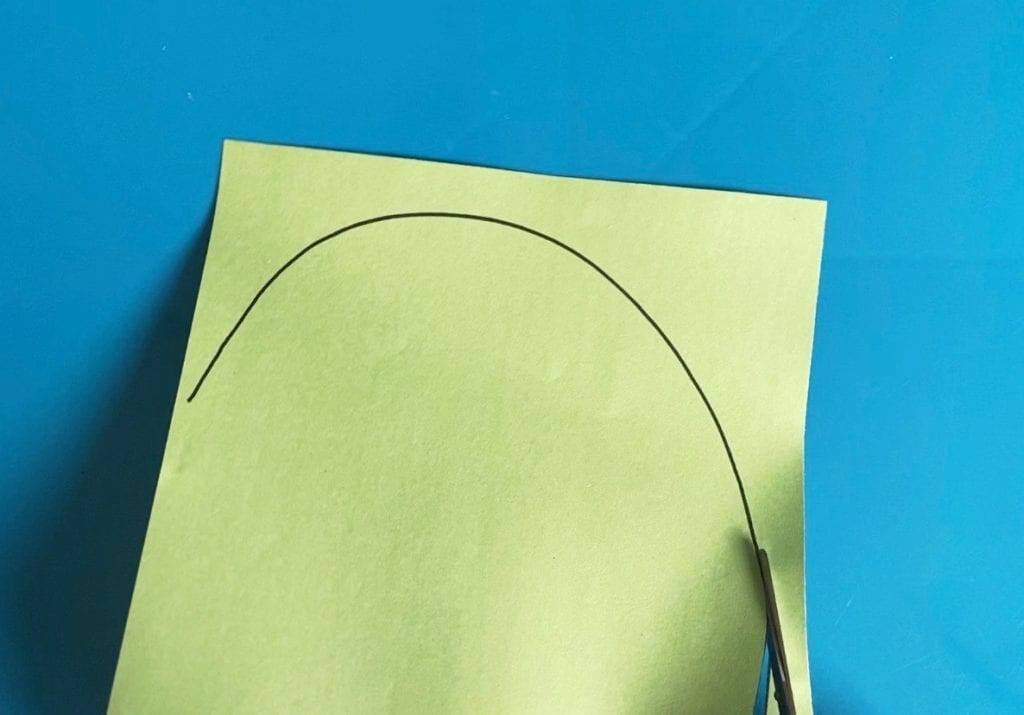
Step 3: Draw a shape for the leaves of the tree on the green paper, then cut it out.
4. Glue the green paper cutout to the white paper. Then, glue the tree trunk over it.
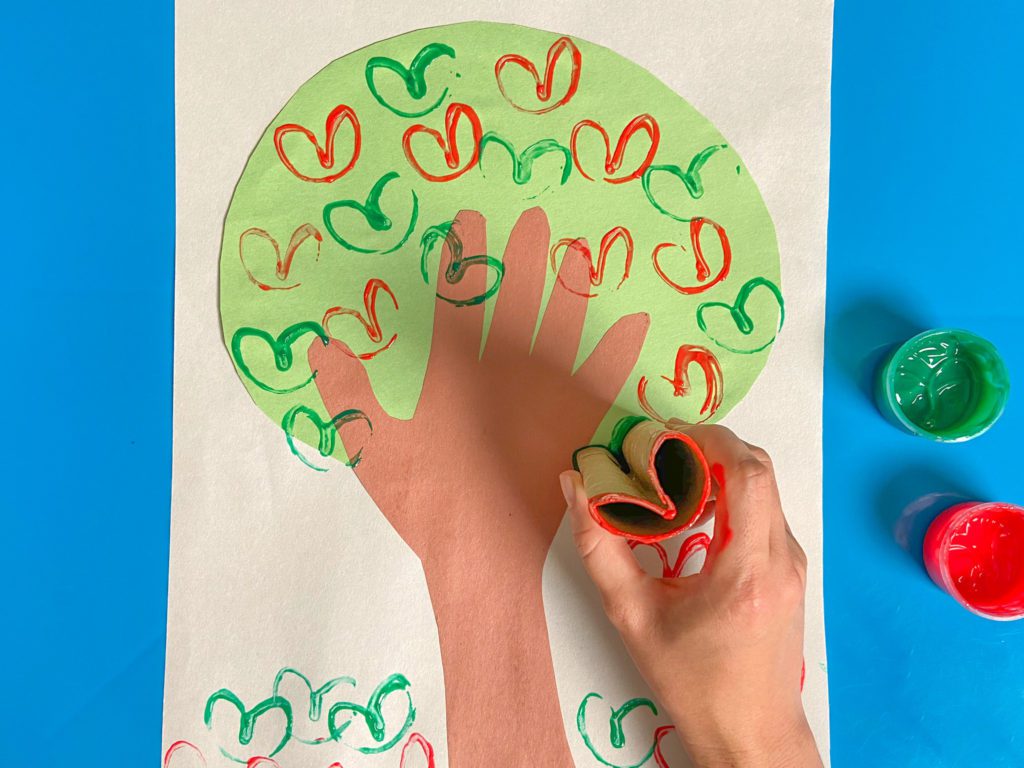
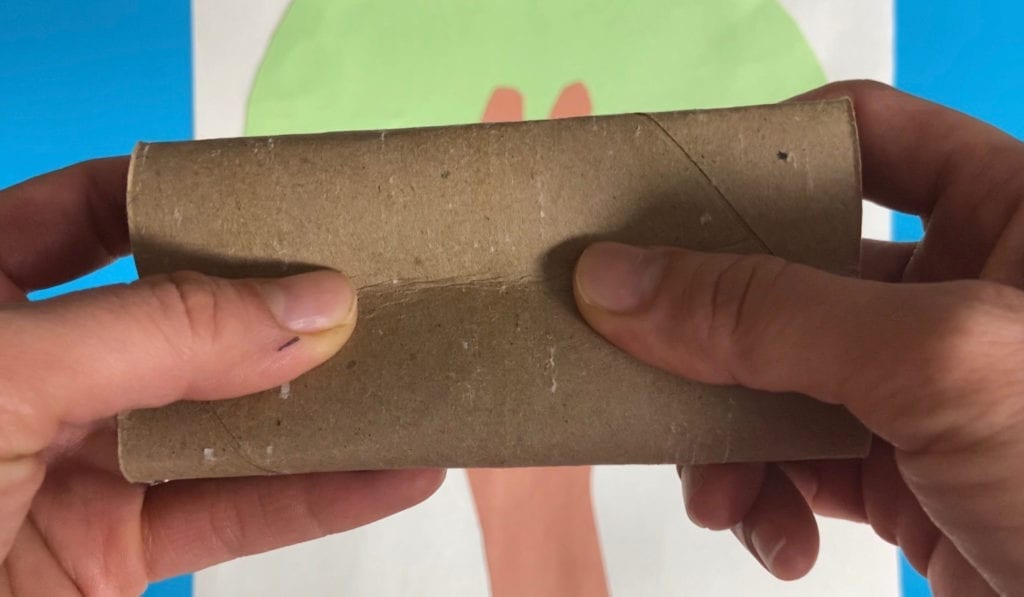
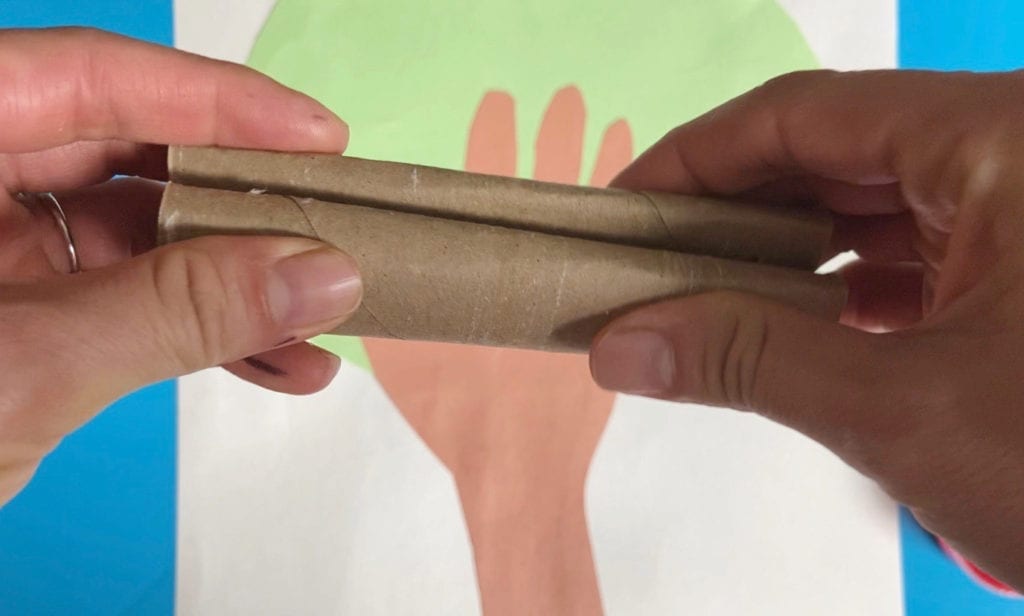
Step 5: Push the toilet paper roll in on one side, then fold that part together. It will form a heart/apple shape to stamp with. If you child can hold the stamp as is, then perfect! If not, use a little tape to hold the folded part together.
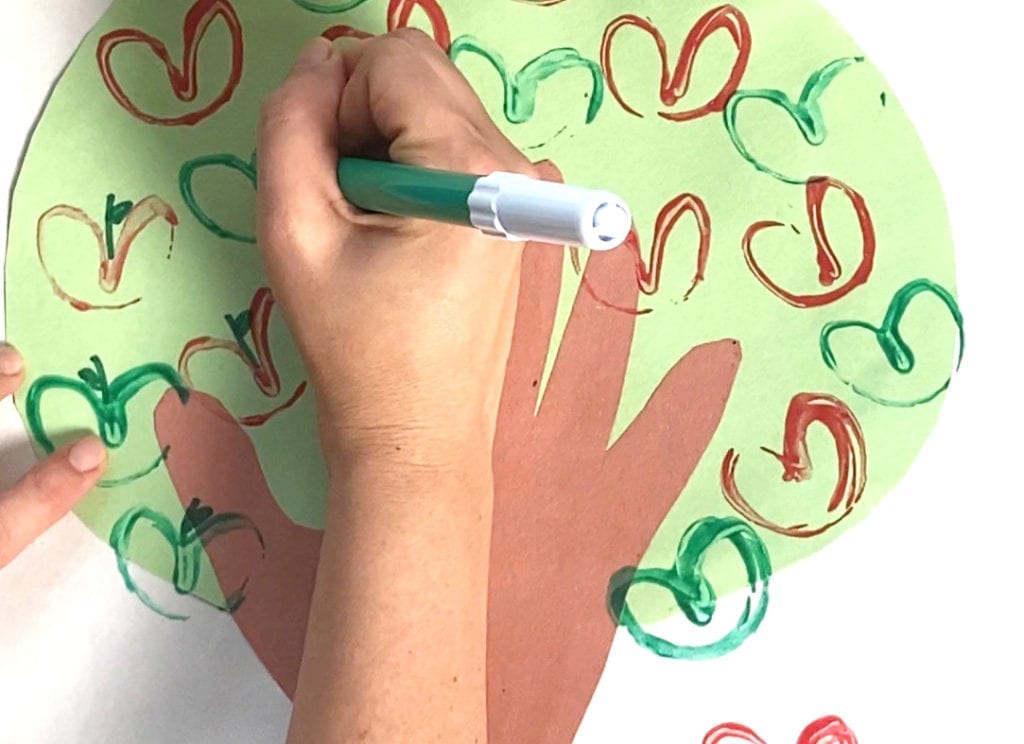
Step 6: Dip one end of the stamp into the paint and stamp apples in the tree (also falling and on the ground if you’d like). If you’re using two colors of paint, use the opposite end of the stamp for the next color.
Step 7: Let the paint dry. Then, use a marker to draw stems on the apples.
TA-DA!
Other Fall Activities
As always, sharing is caring! Please click on the buttons below to share this post with your friends!